

Set up a direct post buyer
A buyer is a company that receives your leads. With direct post, Leadability sends the whole lead to the buyer in one request and reads the buyer’s response to see whether the lead was accepted.
Before you start
Section titled “Before you start”- A form with fields. See Build your first form.
- The buyer’s posting specs: their URL, field names and what a successful response looks like.
1. Create the buyer
Section titled “1. Create the buyer”-
Go to Buyers and click New Buyer.
-
Enter the Company/Organization name.
-
Optional: check Create a default user and send a login invitation to give the buyer their own login. Enter the user’s name and email.
-
Click Save.
2. Add the buyer to your form
Section titled “2. Add the buyer to your form”-
Open your form and go to the Lead Distribution tab.
-
Click Add Buyer.
-
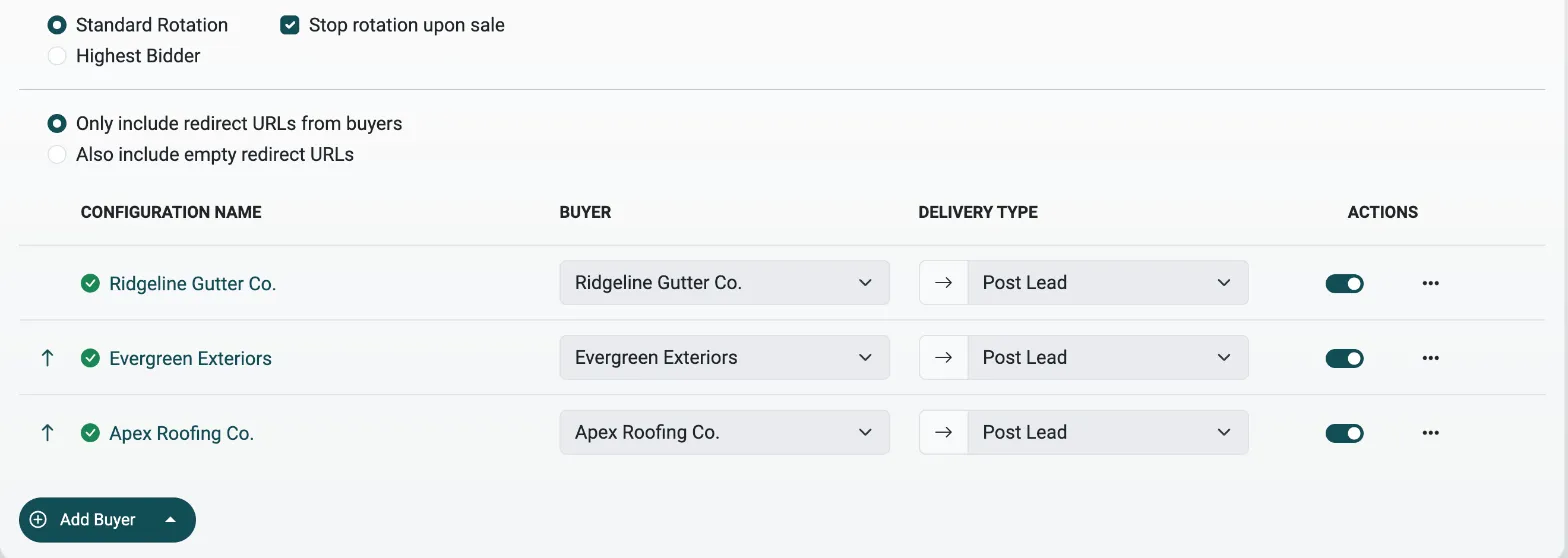
Pick the Buyer and set Delivery Type to Post Lead.
-
Click Edit Configuration to set it up.
Setup is split into steps across the top: General, Schedule, Conditions, Post and Transport. Steps with missing settings are marked incomplete. When every step is complete, a green check appears next to the configuration name and the buyer is ready to go live.
3. General
Section titled “3. General”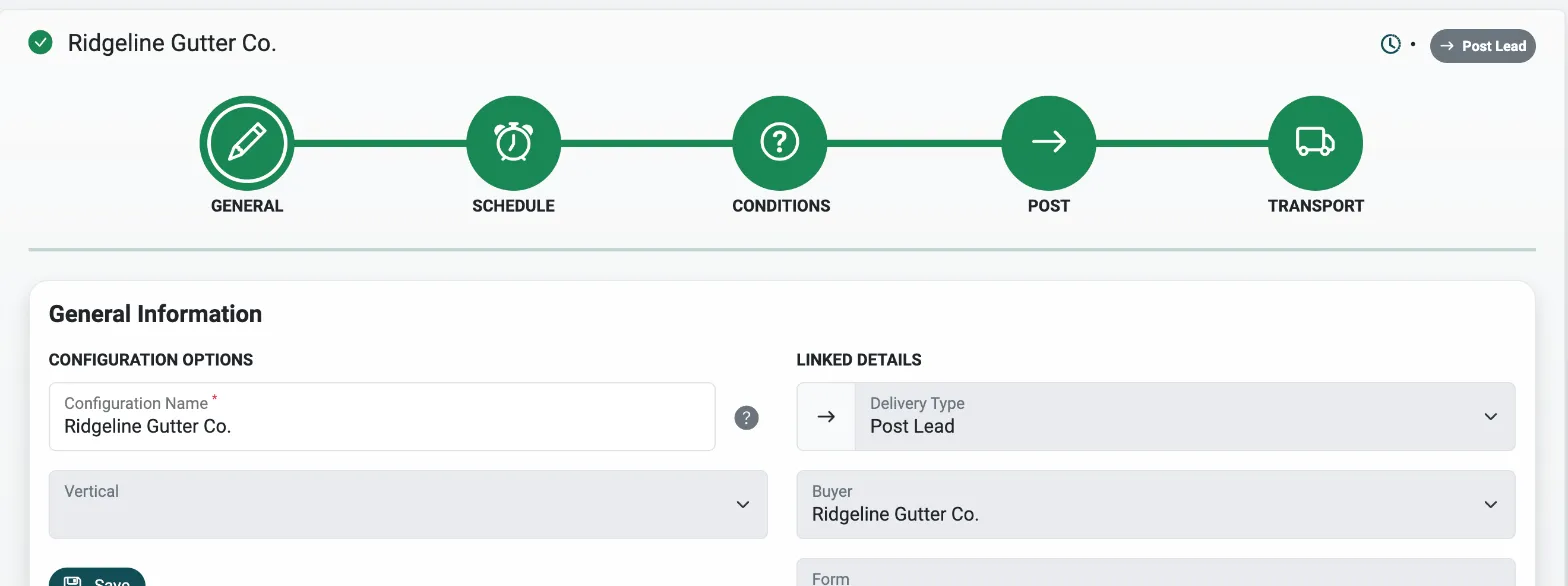
- Configuration Name: defaults to the buyer’s name. Rename it if one buyer has several configurations, for example one per traffic source.
- Vertical: optional.
4. Schedule
Section titled “4. Schedule”Click and drag to select the hours this buyer takes leads. Use Ctrl+click to add to a selection. Leads that arrive outside these hours skip this buyer.
Hours are shown in your computer’s local time.
5. Conditions
Section titled “5. Conditions”Conditions filter leads before they’re sent, so the buyer only gets leads it wants.
For example, only send leads where state is one of TX, FL or GA.
Click Add New and set the Field Name, Condition and Value.
6. Post: map your fields
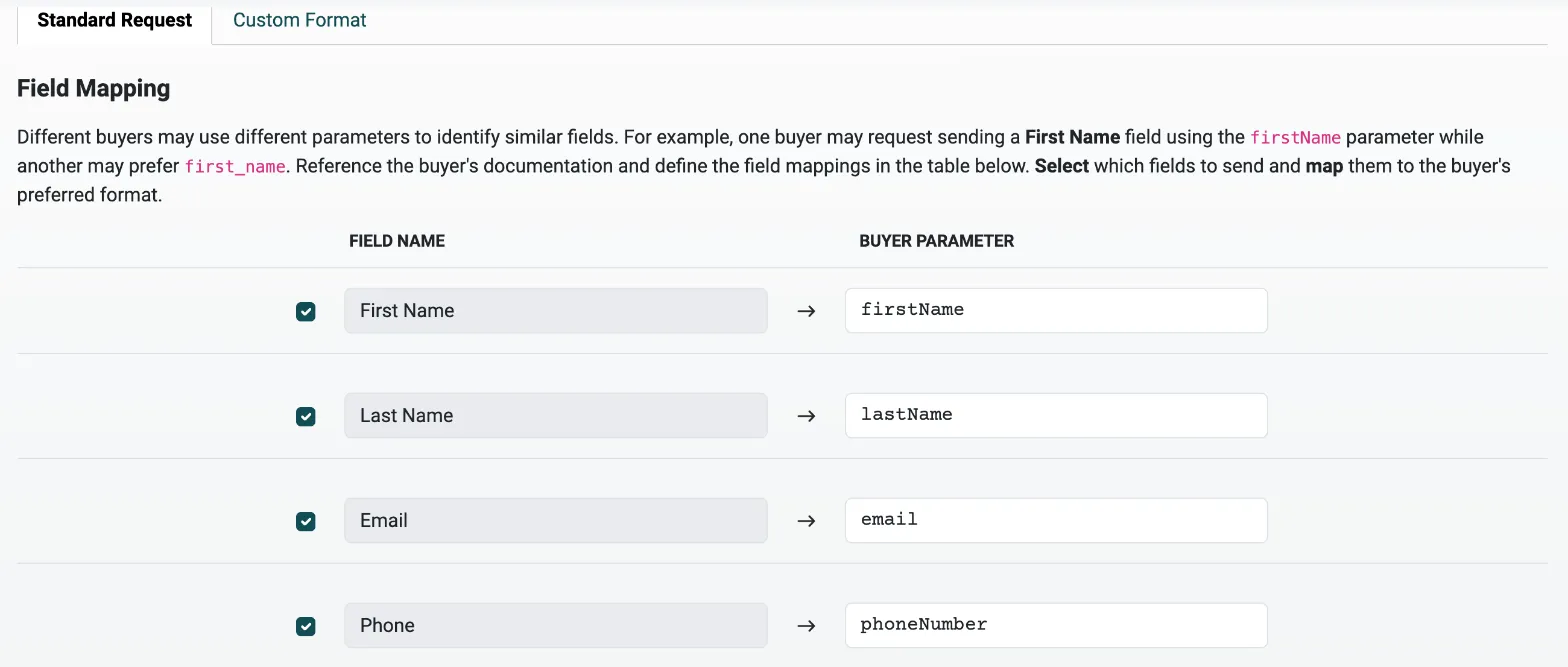
Section titled “6. Post: map your fields”Buyers often name fields differently. One wants firstName, another first_name.
Field Mapping: check the form fields to send and enter the Buyer Parameter each one should be sent as. Changes here save automatically.
Additional fields: add fields the buyer needs that aren’t on your form, such as a
source_id the buyer gave you. You can also send lead details like Lead ID,
Seller ID or IP Address, or combine fields:
| Buyer Parameter | Value |
|---|---|
full_name |
[first_name] [last_name] |
source_id |
12345 |
Mutators change a value’s format for one buyer. Put the parameter and mutator in square brackets, separated by a comma:
| Value | Sends |
|---|---|
[phone, digits] |
(555) 123-4567 as 5551234567 |
[zip, first:3] |
90210 as 902 |
[dob, mmddyyyy] |
1980-07-04 as 07/04/1980 |
Click the mutators link in the app to see the full list. Values that don’t match the expected format are sent unchanged.
Custom Format: if the buyer wants a specific payload, such as nested JSON, write it here instead.
7. Transport: where and how to send
Section titled “7. Transport: where and how to send”Request
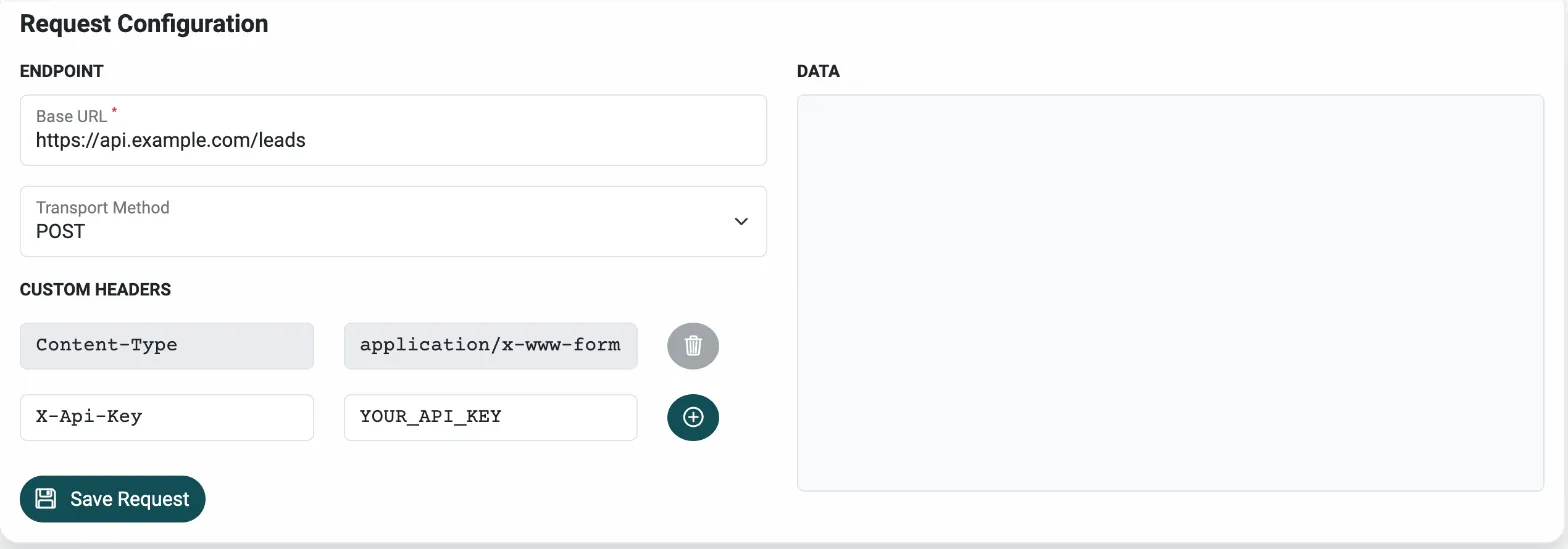
- Base URL: the buyer’s endpoint.
- Transport Method: GET, POST, JSON, XML or Custom POST.
- Custom Headers: for API keys or other headers the buyer requires.
Response: tells Leadability how to read the buyer’s reply.
- Response Type: JSON, XML, Plain Text or HTTP Status.
- Success Key and Success Value: where in the reply to look, and the value that means the lead was accepted.
- Price Key: where the buyer’s reply says what it paid, if it does.
- Redirect Key and Transaction Key: optional values to read from the reply.
- Sale upon success: on by default, so an accepted lead counts as a sale.
For nested replies, use dot notation such as response.success, or bracket notation
such as bids[0].payout.
For example, with Success Key status, Success Value accepted and
Price Key price, this reply is a sale at $25:
{ "status": "accepted", "price": 25.00 }- Timeout: how many seconds to wait for the buyer.
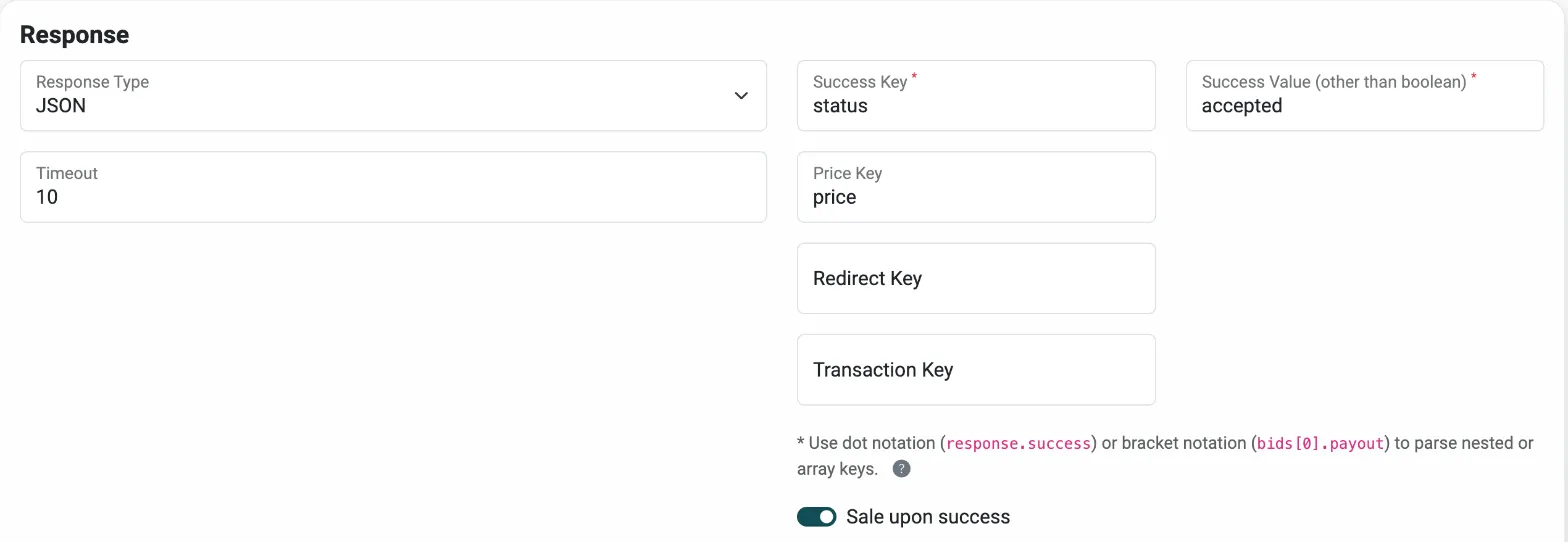
Click Save Request.
8. Test the buyer
Section titled “8. Test the buyer”-
Open the form’s Submit Test tab.
-
Under Test Buyers, click Test next to your buyer to send it a test lead.
-
Check the request and response. If the buyer rejects it, compare your field mapping with their specs.
9. Choose how leads are sold
Section titled “9. Choose how leads are sold”Back on Lead Distribution, pick how the form sells to its buyers:
- Standard Rotation: tries buyers in order. With Stop rotation upon sale, each lead is sold once.
- Highest Bidder: tries every buyer at once and sells to the best offer. Every active buyer needs ping/post or a set price.
Then publish your changes. See Publish your changes.
Example: from buyer spec to settings
Section titled “Example: from buyer spec to settings”Say a buyer sends you this spec:
POST
https://api.example.com/leadsHeader:X-Api-Key: YOUR_API_KEY
Field Notes firstNamerequired lastNamerequired required phoneNumber10 digits, no formatting zip3first 3 digits of the ZIP code source_idalways 12345Reply:
{ "status": "accepted", "price": 25.00 }or{ "status": "rejected", "reason": "..." }
Here’s where each part goes:
| Spec | Step | Setting |
|---|---|---|
| URL | Transport | Base URL: https://api.example.com/leads |
| POST | Transport | Transport Method: POST |
X-Api-Key header |
Transport | Custom Headers: X-Api-Key / YOUR_API_KEY |
firstName, lastName, email |
Post | Field Mapping: check each field and enter the buyer’s name |
phoneNumber, digits only |
Post | Additional field phoneNumber = [phone, digits] |
zip3 |
Post | Additional field zip3 = [zip, first:3] |
source_id |
Post | Additional field source_id = 12345 |
| JSON reply | Transport | Response Type: JSON |
"status": "accepted" |
Transport | Success Key status, Success Value accepted |
"price": 25.00 |
Transport | Price Key price |
Then send a test lead and check that the request matches the spec.
Next steps
Section titled “Next steps”- Fix a rejected lead, when a buyer says no.
- Build a ping/post form
- Set up a ping/post buyer