

Build your first form
A form is where your leads come in. Sellers post leads to the form, Leadability checks every field, and then sends the lead on to your buyers.
This guide builds a direct post form: the seller sends the whole lead in one request. For the two-step version, see Build a ping/post form.
Before you start
Section titled “Before you start”- A Leadability account
- At least one seller to send the leads
1. Create the form
Section titled “1. Create the form”-
Go to Data Management → Forms and click New Form.
-
Fill in:
- Name: what you’ll call it, for example
Auto Insurance – Direct. - Type: Direct Post.
- Vertical: the industry the leads belong to.
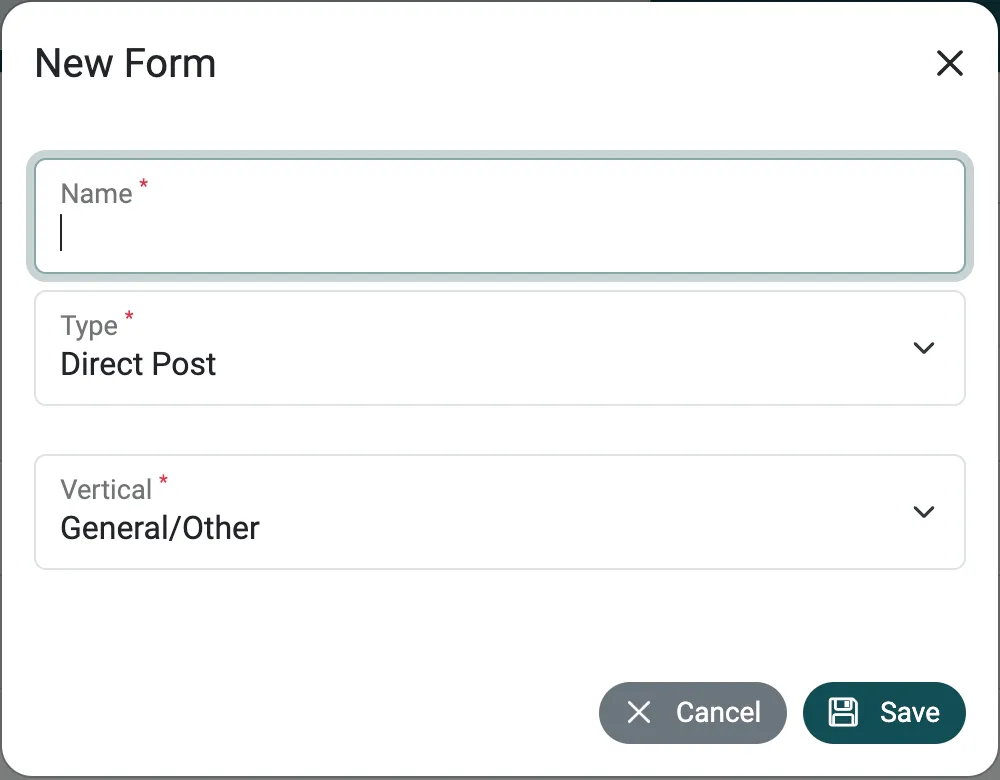
- Name: what you’ll call it, for example
-
Click Save. The form opens on its Form Management tab.
2. Set the form details
Section titled “2. Set the form details”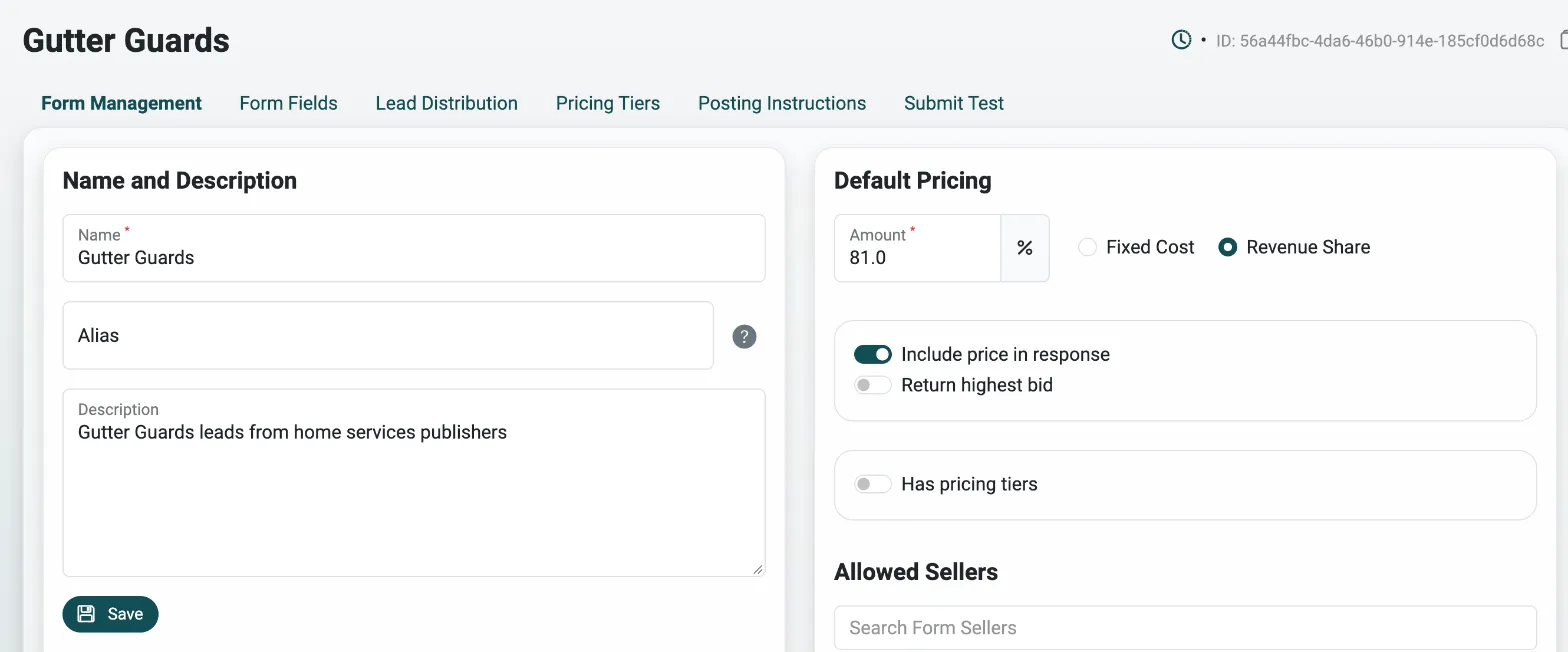
On Form Management you can:
- Add an Alias. Sellers see the alias instead of the form name, so internal names stay private.
- Choose Keep Unique Data (1, 7, 14 or 30 days). This is how long Leadability remembers unique values, like an email address, to reject duplicates.
- Set Default Pricing: a Fixed Cost per lead or a Revenue Share.
- Under Allowed Sellers, add each seller who may post to this form. You can give a seller its own price.
3. Add fields
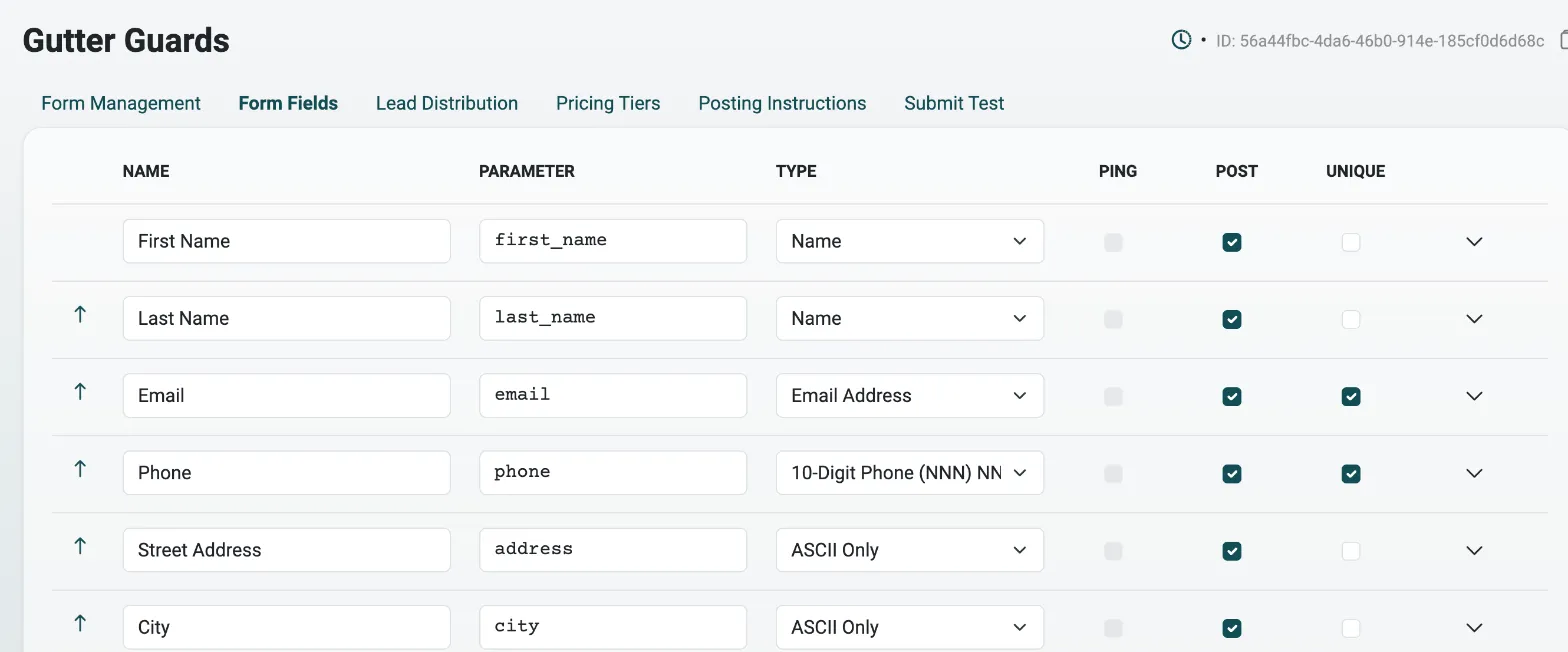
Section titled “3. Add fields”Fields are the data you collect, such as name, email and phone.
Every new form starts with three required fields:
| Name | Parameter | Type | Unique |
|---|---|---|---|
| First Name | first_name |
Name | No |
| Last Name | last_name |
Name | No |
email |
Email Address | Yes |
Keep, edit or remove them, then add your own:
-
Open the Form Fields tab and click Add New.
-
For each field, set:
- Name: a label for you, such as
First Name. - Parameter: the exact key the seller sends, such as
first_name. - Type: how the value is validated, such as Email Address or 10-Digit Phone. Leads with invalid values are rejected.
- Post: check it to make the field required. The lead is rejected without it.
- Unique: check it to reject duplicates of this value for the Keep Unique Data period.
The Ping column is for ping/post forms.
- Name: a label for you, such as
-
Click Save.
4. Publish your changes
Section titled “4. Publish your changes”Changes to a form are saved as a draft first. They don’t affect live leads until you publish them.
When a form has unpublished changes, a banner appears at the top of the form:
-
Click Review Changes to see exactly what will change.
-
Click Publish to make the changes live, or Revert to discard them.
5. Share posting instructions
Section titled “5. Share posting instructions”The Posting Instructions tab has everything a seller needs to post to the form: the post URL, request method, content type and the full field list.
-
Pick the Seller. Each seller gets its own auth token.
-
Click Download, or send the seller a link to the page.
Use Additional Instructions on the Form Fields tab to add notes to the bottom of the instructions.
6. Send a test lead
Section titled “6. Send a test lead”-
Open the Submit Test tab.
-
Click Auto-fill to fill every field with sample data, or type your own.
-
Click Submit and check the response. Leadability always replies in JSON.
Sellers can also send test leads by setting the test parameter to true.
Next steps
Section titled “Next steps”- Set up a direct post buyer, so leads from this form get delivered.